


Student Management
1. Overview
At Toddlers App, we are committed to creating enriching educational environments that support the developmental needs of every child. As part of our mission, we offer comprehensive support for adding students in branches and classrooms, ensuring that each child receives the best possible learning experience in a well-organized and nurturing setting.
2. How to access Student Management?
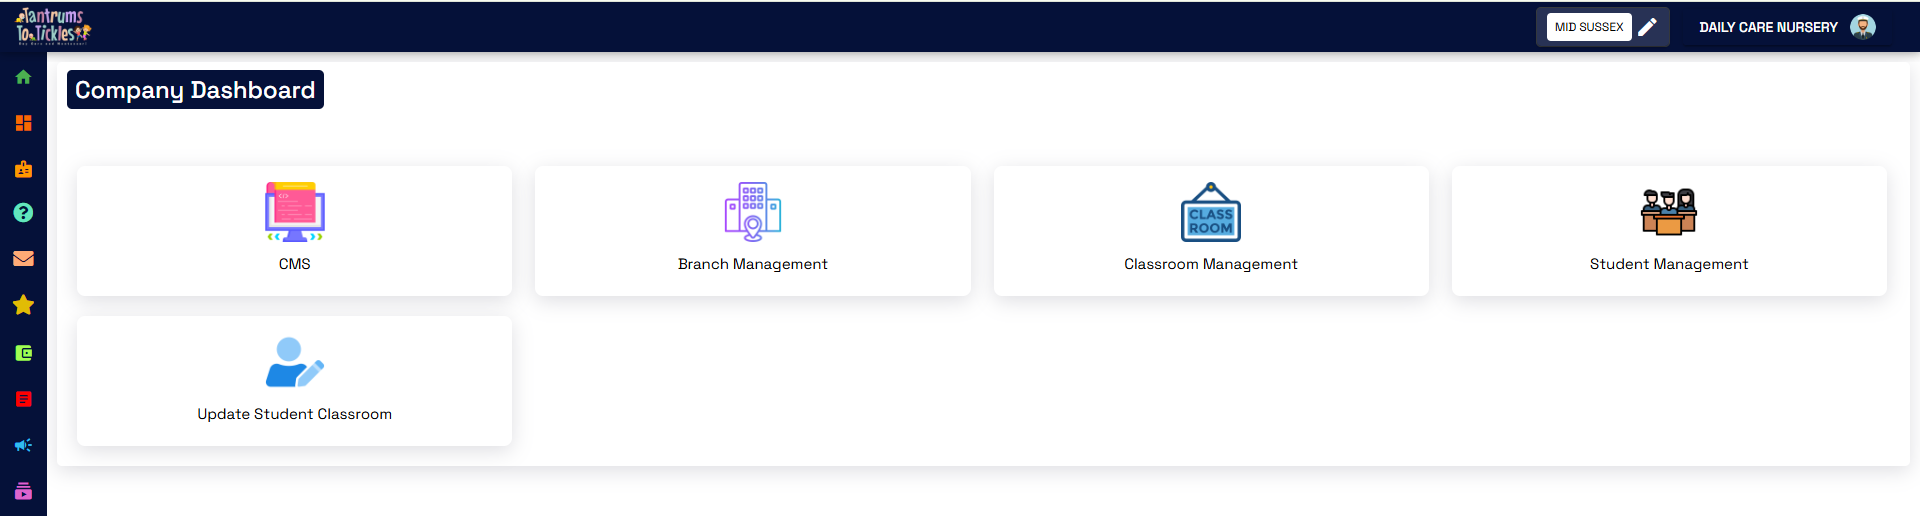
To access student management, first you have to go to Company Dashboard By clicking on Company Dashboard icon from side bar. After this, you will have to click on Student Management icon.
3. Adding New Student
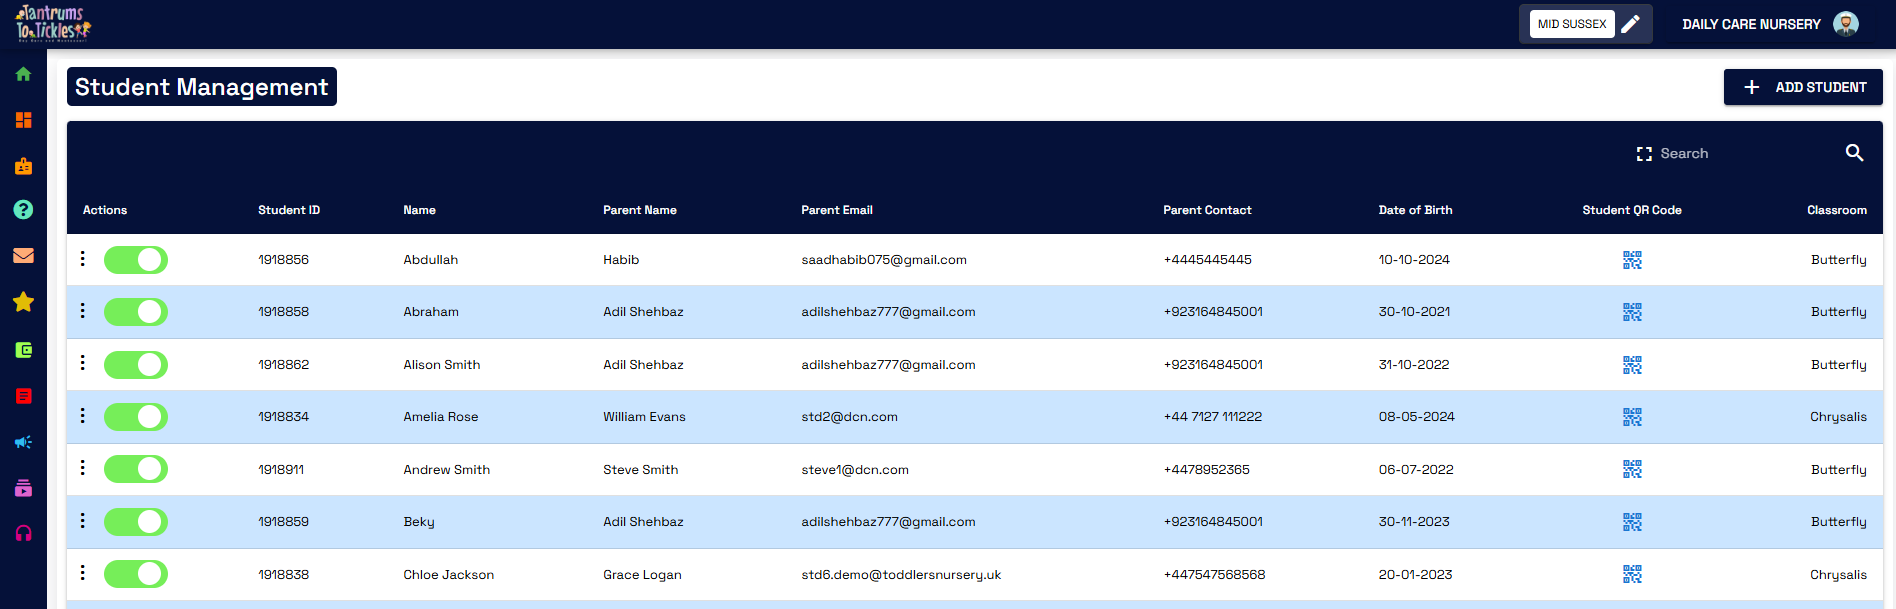
In Student Management, you will see the list of all the students of the branch that is selected in the environment and if there is no student added then this page will be empty. Now, to add new student you will have to click on ADD STUDENT button which is at the top-right of student management page. After clicking on this button, A form will open where you will have to add the detail of student and his or her parent.
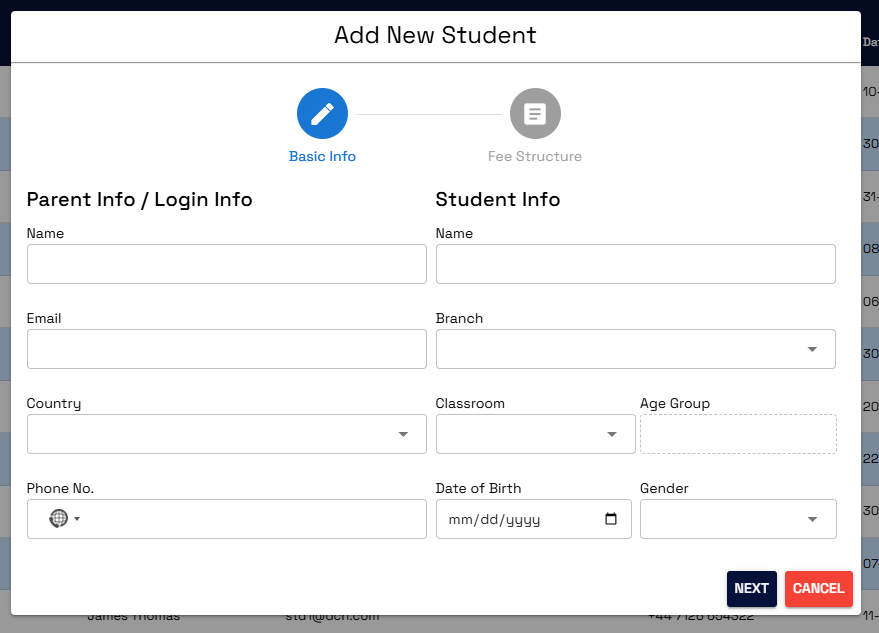
After adding the detail of student and parent click on next and a form will appear where you will set the fee structure and the installment plans for fee.
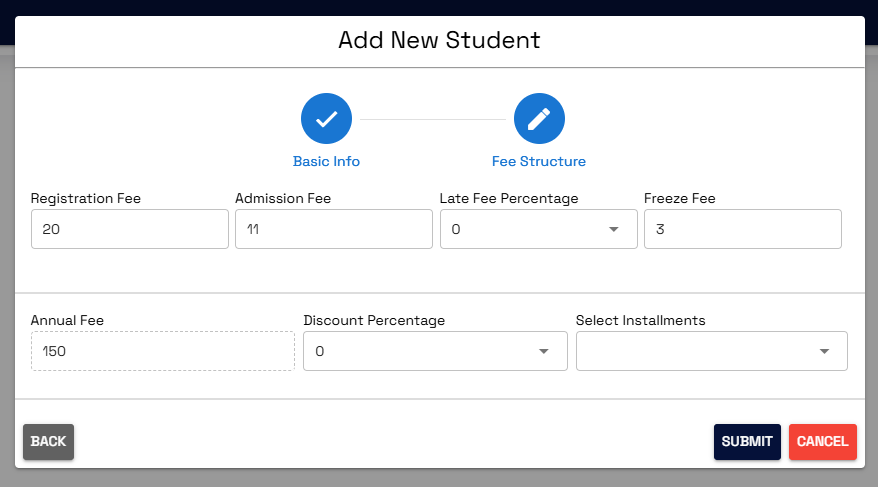
After this just click on submit and the student will be added.
4. Updating Information of any Student
To update the information of any student, On student management page go to the row of student you want to update among the table of all Students and just click on the name of that student and the student update form will open.
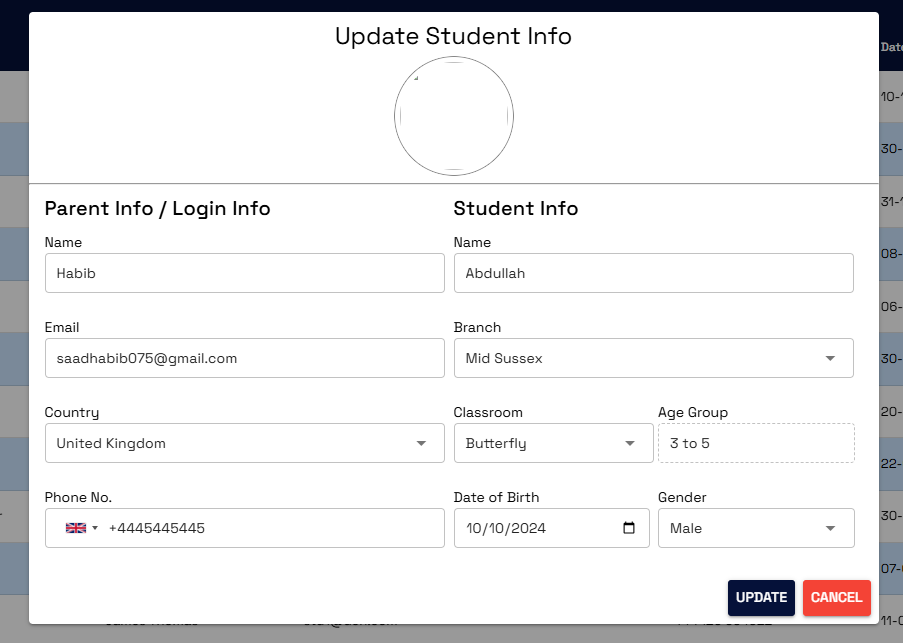
Here you will see the fields will already filled with the previous data and you can now update any of the field that you want including image of student. After this just click on the update button at the bottom and the record will be updated.
5. Updating Fee Cycle of Students
If you want to update fee cycle of any student, you can do so easily by just clicking on three dots in the actions column of that student. Then you will see some options among them you have to select the first one which is fee cycle.
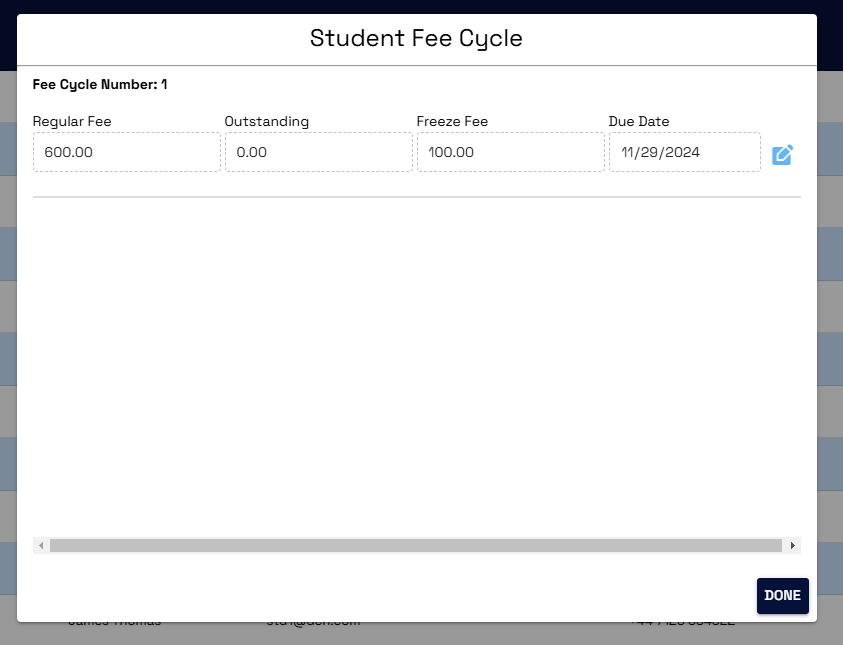
Here you will see all the fee cycles added for that student and against every fee cycle you will see an update icon unless the fee is not paid. Once the fee is paid the update icon will not appear against that fee cycle.
Now to update click on the update icon against the fee cycle that you want to update.

Here you will see the fields will be already filled with the previous data and you can now update any of the field that you want. After this just click on the submit button at the bottom and the fee cycle will be updated.
5. Adding new fee cycle for existing student
If you want to add new fee cycle for the student you can do so by clicking on three dots in the actions column of that student. Then you will see some options among them you have to select the second one which is Add fee cycle.
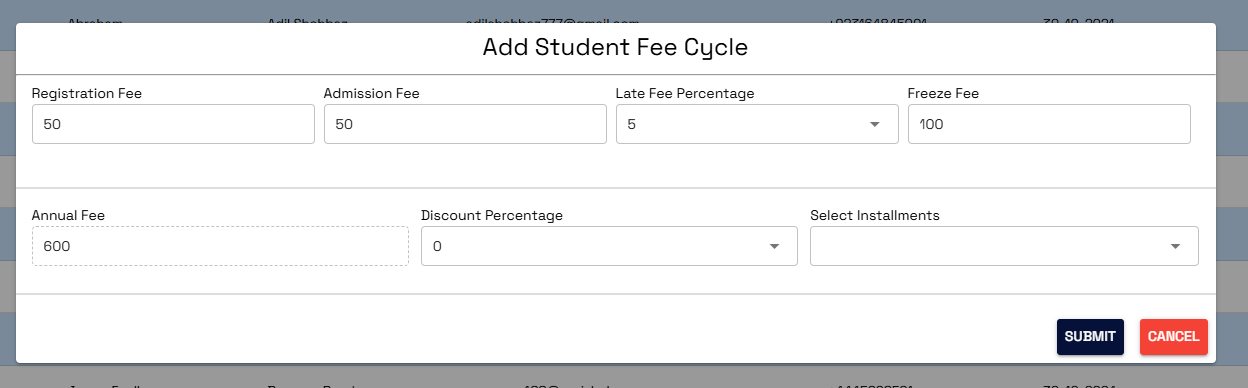
Fill the values in all the fields and select installments as per your choice.
Then click on submit. The new fee cycle will be added.